oTree Crash Course
Session X - Advanced Templates
2023-08-09
Components of an oTree Experiment
Images
<img>: Images

Not robots
Styling tables with Bootstrap

Creating a div and modifying its appearance
<div>: A division or section in an HTML document

Modifying the templates appearance by using CSS

Practice (or assignment)
- Go to your
pggapp and modify the template so that it looks like this:- Bullet list for instructions
<ul> <li> </li> </ul> <strong>in two places for bold- Check bootstrap documentation to find the container
- Bullet list for instructions

Previewing HTML files in VS Code
- Go to extensions panel and search for
live preview![]()

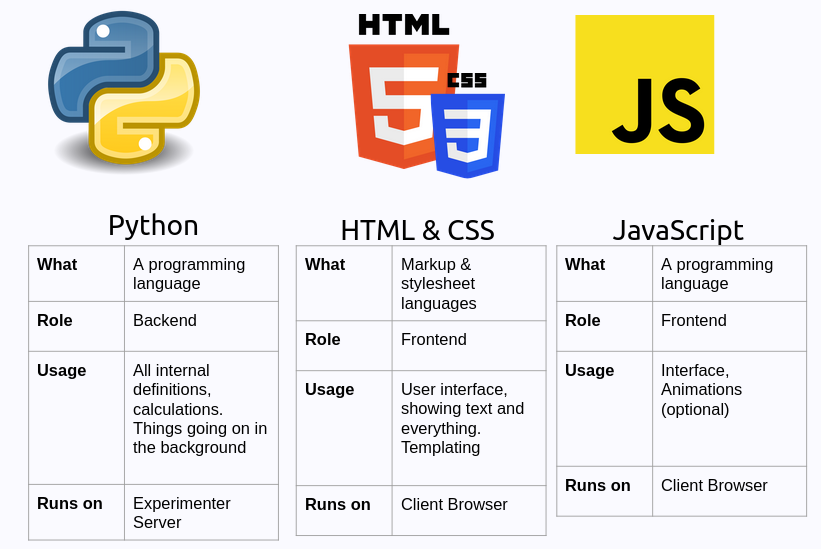
JavaScript
JavaScript is a programming language that adds interactivity to your pages
You can add them to your templates by using
<script>tagExample:
